This website uses cookies to ensure you get the best experience on our website.
Read more

Product Information
-
February 10, 2022
See what innovation looks like. WPI introduces the 3D SpectaScope™ Inspection Scope. WPI has reinvented the stereo scope for 3D macroscopic imaging.
With patent-pending technology and intuitive copyrighted software, the 3D SpectaSCOPE™ utilizes enhanced reality screen technology and is designed to meet the specific needs of different industries. With an incredible working distance of 300 mm, automatic self-focusing and true 3-dimensional viewing, the 3D SpectaSCOPE™ lets you increase throughput while achieving greater accuracy at the highest detail. The 3D SpectaSCOPE™ is optimal for rework, through-hole assembly and inspections, and it is available in multiple configurations. See what 3D innovation looks like at World Precision Instruments.
...more -
February 04, 2022
Overview of the MICRO-ePUMP
Designed to simplify intracellular injection and a variety of other microinjection tasks, the MICRO-ePUMP uses carefully regulated air pressure for injecting cells with fluid. Injected volumes range from picoliters to nanoliters. Timing, injection pressure and compensation pressure are adjusted independently using the touch screen interface. Time intervals can range from 2 seconds down to 10 ms or less, depending on the injection pressure setting. The injection pressure interval is triggered using the foot switch.
The MICRO-ePUMP is designed to inject very small quantities of fluids, such as drugs, into cells or small organelles. Two different positive pressures may be applied with a precision timing circuit that switches between the two pressure automatically.
- The port supplies positive pressure for high-pressure ejection.
- The pressure port maintains a low positive “compensation” pressure to the injecting...more
-
September 27, 2021
The manual microsyringe pump is a convenient tool for precise manual injection of fluid using glass pipettes or similar injection devices. The design allows visual feedback of flow at the pipette tip. They can also be used as a manual micro syringe pump for perfusion or withdrawal of liquids. The resolution of the injection volume can be continuously varied from 10 nanoliters to the microliter range, depending on the syringe used. Here we show you how to setup your system.
- Loosen the...more
-
July 23, 2021
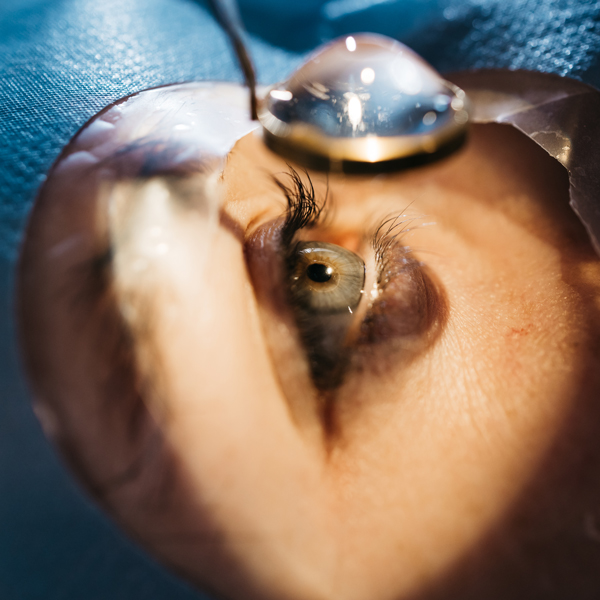
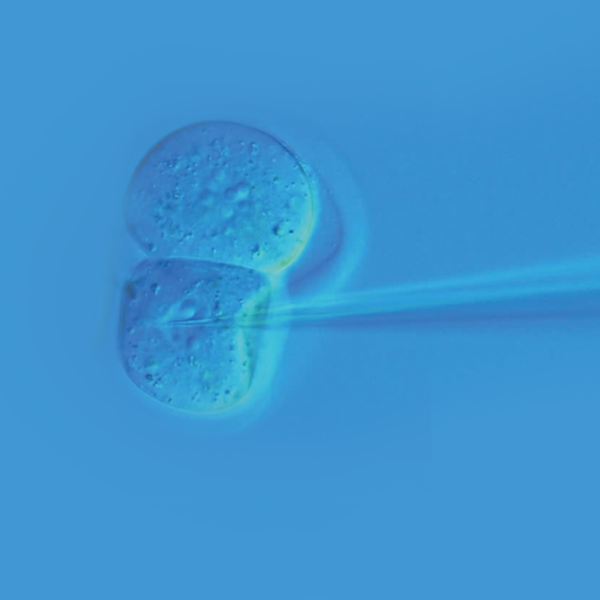
Do you want to take the next step in your CRISPR-CAS9 projects, making the injection of biomolecules in your cell lines more efficient? You can now increase the viability of injected embryos with WPI’s MICRO-ePORE, which offers improved repeatability and functionality for pinpoint cell penetration for targeted microinjections in transgenesis.
Improve Embryo Survival with Pinpoint Cell Penetration
Principle of MICRO-ePORE™ Technology
- Classic Microinjection of biomolecules with capillaries causes permanent damage to the cell membrane...more
-
June 21, 2021
WPI offers alkaline cleaners for the pharmaceutical, biotech, medical device, healthcare, precision engineering, and other sectors.
-
June 15, 2021
When you are looking for a low toxicity adhesive with some elasticity and good moisture resistance, choose a silicone adhesive.
-
June 15, 2021
Both Kwik-Sil and Kwik-Cast are silicone adhesives, but they are a little different.
-
May 27, 2021
This video shows how to setup the heavy boom microscope stand (502004), which can be used with a PZMIII or PZMIV microscope head. The PZMIII and PZMIV require the 502009 76mm focus mount. The setup of the 505606 heavy boom stand is identical. The 505606 uses the 505610 focus mount that is designed for use with the Enhanced Reality Macroscope. The focus mounts are sold separately.
Stand Components
These are the pieces of the boom stand.
(1) Heavy Base
(1) Vertical Post
(1) Guard Ring
(1) Horizontal Bar
(1) Cross Block
(1) Anchoring Screw with Locking Washer
(1) Hex Key
(1) Clutch Handle...more
-
May 27, 2021
This video shows how to setup the articulating arm clamp stand for a microscope (502007), which can be used with a PZMIII microscope head. The PZMIII requires the 502009 76mm focus mount. The setup of the 505607 articulating arm stand is identical. The 505607 uses the 505610 focus mount that is designed for use with the Enhanced Reality Macroscope. The focus mounts are sold separately.
Stand Components
These are the pieces of the stand.
(1) Table clamp base
(1) Middle horizontal bar
(1) Adjustable forearm
(2) Clutch handles
(2) Adjustment screws
(2) Ring washers (white)
Set...more
-
May 27, 2021
This video shows how to setup the post stand for a microscope (502007), which can be used with a PZMIII microscope head. The PZMIII or PZMIV require the 504947 76mm focus mount. The setup of the 505608 post stand is identical. The 505608 uses the 505609 focus mount that is designed for use with the Enhanced Reality Macroscope. The focus mounts are sold separately.
Stand Components
These are the pieces of the stand.
(1) Base
(1) Vertical Post
(1) Vertical Post Extension
(1) Guard Ring Support
(1) Reversible Plate
(1) Clutch Handle
(1) Post Cap
(1) Focus Mount
504947 Focus Mount included with the 503102...more
-
April 27, 2021
The PUL-1000 is a microprocessor controlled, four-stage, horizontal puller for making glass micropipettes or microelectrodes. Here is how to run a program that will pull two identical microelectrodes.
Loading a Program
We will use the keypad to navigate through the display.
- Use the arrows to navigate to LOAD (00). The top and bottom arrows on the keypad navigate numbers in increments of 1. The left and right arrows on the keypad navigate numbers in increments of 10. Press ENTER. The number will start blinking.
- Use the arrows to navigate to the program number you would like load. Once you reach the desired program, press ENTER...more
-
April 23, 2021
Let’s look at a Peri-Star Pro peristaltic pump, which is available in four models for high and low flow rate, and 2, 4 and 8 channels. Here’s a quick introduction to the pump.
Control Keypad
Setup and operation are controlled with a Control Knob and three membrane keys. Pressing a membrane key once activates the key function.
- The Run/Stop button switches the pump on or off. If the pump is running, pressing this key immediately stops pump. If the pump is off, pressing the key turns it on.
- The Rotation Direction button sets the rotor direction clockwise or counterclockwise. The direction is shown on LCD display.
- The Full Speed button runs the pump at maximum flow rate. This is convenient to use when evacuating or cleaning the system...more
-
April 23, 2021
The Peri-Star Pro is a popular peristaltic pump. Here we see how to calibrate the pump so that the display shows the dispensed volume accurately.
In addition to the traditional RPM control, Peri-Star Pro also allows control of pump output by setting a calibrated flow rate. Flow rate is affected by tubing ID, tubing material, and rotor speed. Peri-Star Pro stores the flow rate relation of silicone tubing and rotor speed so that you can easily switch between controls for flow rate or RPM (revolutions per minute). Calibration is required for high precision pumping or after changing to a different type of tubing.
One of the important and unique features of Peri-Star Pro is that the control of liquid flow can be expressed either as the rotation rate of the pump head (rotation per minute, or RPM) or directly as the flow rate in milliliters per minute (mL/min.) or milliliter per hour (mL/hr). This feature makes reporting and repeating the experiment much easier...more
-
April 23, 2021
The PUL-1000 is a microprocessor controlled, four-stage, horizontal puller for making glass micropipettes or microelectrodes. Here is a quick overview to get you started quickly.
Quick Start Setup
- Plug the power cord into the wall outlet. An LED light on the power supply illuminated when the unit is connected to power.
- Plug the power cord into the rear panel of the PUL-1000. Then, the power switch on the side panel illuminates.
- Press the Power button to turn on the display.
- To open the glass capillary clamps, place your thumb under the clamp and depress the release button with your index finger. This allows the carriages to move freely.
- Push the carriages together toward the center.
- Install the silicone glass capillary...more

Recent Posts