This website uses cookies to ensure you get the best experience on our website.
Read more

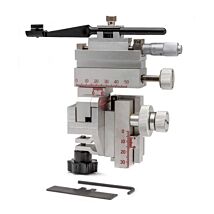
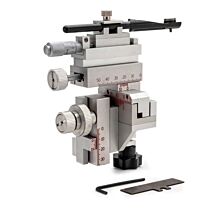
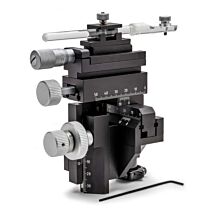
How to Adjust for Mechanical Drift in a KITE Manual Micromanipulator
February 10, 2021
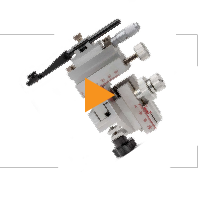
Over time, you may experience mechanical drift in one or more of the axes of your manual micromanipulator. Here we show you how to adjust for that. The process is similar for other styles of manual micromanipulators. We will look at the process for adjusting all three axes of a KITE micromanipulator.
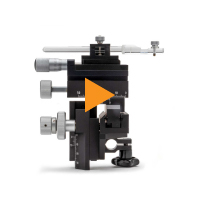
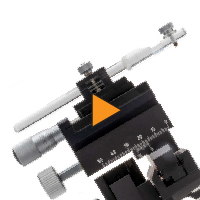
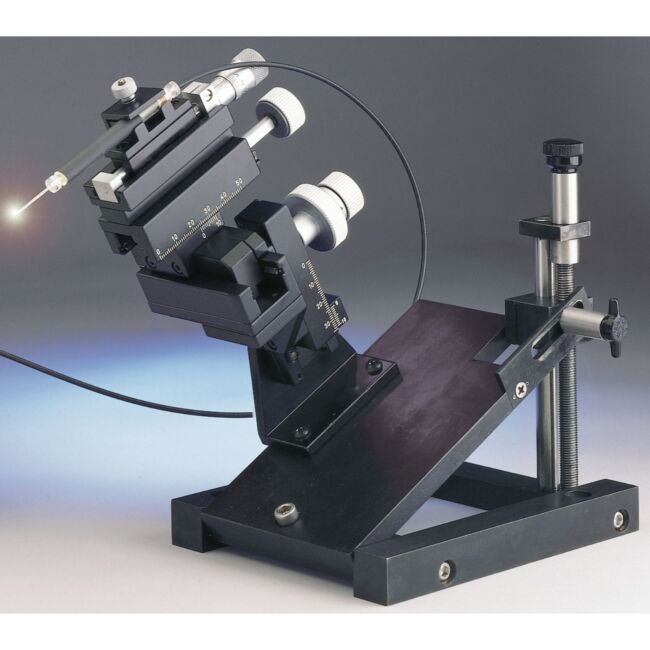
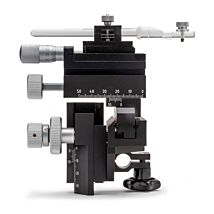
Let's talk about mechanical drift on a micromanipulator and how to correct it. In this demonstration, we will use the popular KITE. A manipulator axis may begin to move gradually under its own weight, even if it's not being touched. This is called mechanical drift, and it happens from normal use of the manipulator over time. Each course axis control on the micromanipulator has its own adjustments. This procedure is very similar to the one we used for adjusting an M3301 micromanipulator. It also works similarily on an MD4 or an MMJ. Your X, Y and Z axis controls are located on a single plane at the back of the manipulator. The X-axis fine control is on the top, the X-axis course control is in the center and the Y-axis control is on the bottom. The Z-axis course control is locate behind the Y-axis knob, and in between the two is an adjustment ring. On the adjustment ring is a tiny screw that we will adjust.
X-Axis Adjustment
Let's start with the X-axis control.
- The first thing you do is drive the axis all the way to the end of its travel to give you a little more room to work.
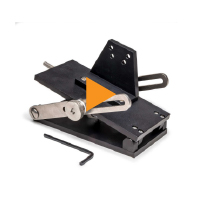
- The control knobs are aluminum, and if you put a pair of pliers directly on one of them, you will scratch it. To keep it looking nice, we're gonna wrap the knob with a scrap of folded paper.
- Then, grasp the knob firmly with a pair of pliers.
- Then, insert the adjustment tool in the end of the knob and loosen it up. Once that nut is loose the silver knob will turn freely.
- Adjust that outer ring to prevent the axis from moving while we're making the tension adjustment. Hold the slide securely and then rotate the adjustment knob until it's right where you want it to be.
You can feel the resistance of the knob inside is as it compresses down against the steel spring and nylon friction components. - Adjustment is somewhat arbitrary, but when the amount of tension feels about right, use your adjustment tool and your wrench and tighten it back down.
- Once you got it where you want, you can test it. Push on the end of the slide with your hand and see how easily it moves. When the tension is adjusted correctly, it will not be easy to move the axis.
- If the action feels too tight or too loose, then you repeat the process. Unscrew it again and readjust the axis tension. It may be necessary to repeat the procedure a couple times.
Typically the goal is to get the tension tight enough to prevent the axis from drifting under its own weight but not any tighter than necessary to achieve this. The correct amount of tension often occurs within a very narrow range of adjustment. If you make it too tight, the knob will be harder than necessary to turn, and you'll wear out the frictional components inside. This requires patience. Take your time. Do it a couple times until you get it right.
Y-Axis Adjustment
Now, you will do the same thing on the Y-axis. It's the same control mechanism. If the manipulator is operated in the standard position with the electrode clamp located right above the manipulator body, then the Y-axis doesn't typically drift as much (unless it's tilted to the left or to the right).
Z-Axis Adjustment
Adjusting the Z-axis is a little bit different. You need a tiny flat head screwdriver. It fits in the screw located on the adjustment ring between the Y- and Z-axis control knob. There's a tiny screw on the ring, and you will need to loosen that and rotate that ring to adjust the Z-axis.
If you have any questions, just give us a call at (866) 606-1974 (Toll free in the USA) or email us at [email protected].
Related Articles
-
How to Adjust for Mechanical Drift in an M3301 Manual Micromanipulator
 Feb 12
 -
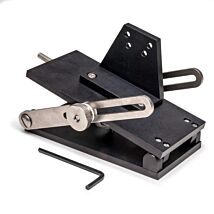
How to Mount an Electrode Holder on Your Micromanipulator
 Feb 12
 -
How to Extend the Life of Your Micromanipulator
 Feb 12
 -
How to Mount an M3301 Micromanipulator on a Tilt Base
 Feb 11
 -
The Ultimate Guide to Micromanipulators
 Oct 20
 -
Micromanipulator Basics
 Nov 20
 -
Set the Configuration Parameters for the Peri-Star Pro
 Apr 19
 -
VIDEO: Setting up the 3D SpectaSCOPE™ - Part 1
 Feb 23
 -
WPI's Low-Noise Amplifiers Outperform Cheap Imitations
 Apr 30
 -
Microinjection Tool Box
 Jan 29
Related Products
- As low as $936.00As low as $1,531.00

Recent Posts


Close