This website uses cookies to ensure you get the best experience on our website.
Read more

Videos
-
May 27, 2021
This video shows how to setup the heavy boom microscope stand (502004), which can be used with a PZMIII or PZMIV microscope head. The PZMIII and PZMIV require the 502009 76mm focus mount. The setup of the 505606 heavy boom stand is identical. The 505606 uses the 505610 focus mount that is designed for use with the Enhanced Reality Macroscope. The focus mounts are sold separately.
Stand Components
These are the pieces of the boom stand.
(1) Heavy Base
(1) Vertical Post
(1) Guard Ring
(1) Horizontal Bar
(1) Cross Block
(1) Anchoring Screw with Locking Washer
(1) Hex Key
(1) Clutch Handle...more
-
May 27, 2021
This video shows how to setup the articulating arm clamp stand for a microscope (502007), which can be used with a PZMIII microscope head. The PZMIII requires the 502009 76mm focus mount. The setup of the 505607 articulating arm stand is identical. The 505607 uses the 505610 focus mount that is designed for use with the Enhanced Reality Macroscope. The focus mounts are sold separately.
Stand Components
These are the pieces of the stand.
(1) Table clamp base
(1) Middle horizontal bar
(1) Adjustable forearm
(2) Clutch handles
(2) Adjustment screws
(2) Ring washers (white)
Set...more
-
May 27, 2021
This video shows how to setup the post stand for a microscope (502007), which can be used with a PZMIII microscope head. The PZMIII or PZMIV require the 504947 76mm focus mount. The setup of the 505608 post stand is identical. The 505608 uses the 505609 focus mount that is designed for use with the Enhanced Reality Macroscope. The focus mounts are sold separately.
Stand Components
These are the pieces of the stand.
(1) Base
(1) Vertical Post
(1) Vertical Post Extension
(1) Guard Ring Support
(1) Reversible Plate
(1) Clutch Handle
(1) Post Cap
(1) Focus Mount
504947 Focus Mount included with the 503102...more
-
April 27, 2021
The PUL-1000 is a microprocessor controlled, four-stage, horizontal puller for making glass micropipettes or microelectrodes. Here is how to run a program that will pull two identical microelectrodes.
Loading a Program
We will use the keypad to navigate through the display.
- Use the arrows to navigate to LOAD (00). The top and bottom arrows on the keypad navigate numbers in increments of 1. The left and right arrows on the keypad navigate numbers in increments of 10. Press ENTER. The number will start blinking.
- Use the arrows to navigate to the program number you would like load. Once you reach the desired program, press ENTER...more
-
April 23, 2021
Let’s look at a Peri-Star Pro peristaltic pump, which is available in four models for high and low flow rate, and 2, 4 and 8 channels. Here’s a quick introduction to the pump.
Control Keypad
Setup and operation are controlled with a Control Knob and three membrane keys. Pressing a membrane key once activates the key function.
- The Run/Stop button switches the pump on or off. If the pump is running, pressing this key immediately stops pump. If the pump is off, pressing the key turns it on.
- The Rotation Direction button sets the rotor direction clockwise or counterclockwise. The direction is shown on LCD display.
- The Full Speed button runs the pump at maximum flow rate. This is convenient to use when evacuating or cleaning the system...more
-
April 23, 2021
The Peri-Star Pro is a popular peristaltic pump. Here we see how to calibrate the pump so that the display shows the dispensed volume accurately.
In addition to the traditional RPM control, Peri-Star Pro also allows control of pump output by setting a calibrated flow rate. Flow rate is affected by tubing ID, tubing material, and rotor speed. Peri-Star Pro stores the flow rate relation of silicone tubing and rotor speed so that you can easily switch between controls for flow rate or RPM (revolutions per minute). Calibration is required for high precision pumping or after changing to a different type of tubing.
One of the important and unique features of Peri-Star Pro is that the control of liquid flow can be expressed either as the rotation rate of the pump head (rotation per minute, or RPM) or directly as the flow rate in milliliters per minute (mL/min.) or milliliter per hour (mL/hr). This feature makes reporting and repeating the experiment much easier...more
-
April 23, 2021
The PUL-1000 is a microprocessor controlled, four-stage, horizontal puller for making glass micropipettes or microelectrodes. Here is a quick overview to get you started quickly.
Quick Start Setup
- Plug the power cord into the wall outlet. An LED light on the power supply illuminated when the unit is connected to power.
- Plug the power cord into the rear panel of the PUL-1000. Then, the power switch on the side panel illuminates.
- Press the Power button to turn on the display.
- To open the glass capillary clamps, place your thumb under the clamp and depress the release button with your index finger. This allows the carriages to move freely.
- Push the carriages together toward the center.
- Install the silicone glass capillary...more
-
April 22, 2021
The PUL-1000 is a microprocessor controlled, four-stage, horizontal puller for making glass micropipettes or microelectrodes. Here we will see how to load a piece of glass into the carriage.
The glass capillary is held by clamps mounted on two movable carriages. Both carriages synchronously slide as a program is executed.
- Manually slide the carriages together when you are loading the glass.
- To open the clamps, place your thumb under the clamp and depress the release button with your index finger.
- Slide the glass capillary into the groove from one side. Slide it through the center of heating filament onto the...more
-
April 22, 2021
The PUL-1000 is a microprocessor controlled, four-stage, horizontal puller for making glass micropipettes or microelectrodes. Here are the resolutions for some common issues with the puller.
Puller Stops
If the puller stops in the middle of a pull and the unit beeps, one of two issues may be the culprit.
- The unit may be over heating. Allow the unit time to cool down before attempting to pull more glass.
- If a program fails in the middle of a pull, you may have exceeded the parameters of the unit. For example, when you add up the distance of travel for all the stages, you may have exceeded the maximum range of travel. Check your program. You may need to alter the heating or travel parameters to conform with the unit’s maximums.
Glass...more
-
April 22, 2021
The PUL-1000 is a microprocessor controlled, four-stage, horizontal puller for making glass micropipettes or microelectrodes. We will show you how to run a glass softening test.
You should run the Softening Test when:
- You change the filament
- Lot numbers or capillary types change
- You create or modify a program
- The ambient environment changes
- Press the STOP key to quit any running program. The following window displays.
- Mount a glass capillary on the carriage.
- Press the START key to run the Glass Capillary Softening...more
-
April 20, 2021
by Benjamin Dubansky, PhD, Animal Physiologist/Researcher
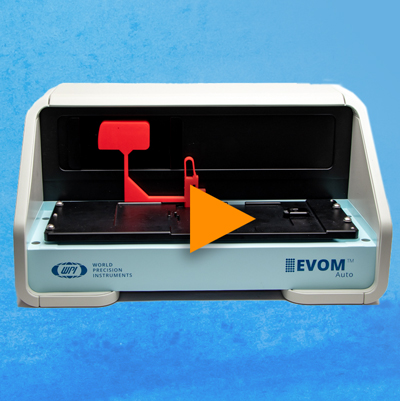
The EVOM is a special kind of voltmeter for measuring electrical properties across a layer of cells in culture or a biological membrane. Here's a few things I like about the new EVOM3.
There's a couple things I like about the EVOM3 better than the older models.
- You can charge it. These ones had batteries which are fine, and they had a power plug. But when you use the power plug, you get a little bit electrical noise, and the signal's not quite as stable. When you have a good battery in here, the charge lasts for quite some time. It charges pretty quickly. You...more
-
April 20, 2021
by Benjamin Dubansky, PhD, Animal Physiologist/Researcher
An Ussing Chamber is used when performing barrier studies across an excised epithelial tissue. Similar measurements can be made in well plates using an EVOM series TEER Measurement Meter, which is used for epithelial tissue that is grown to confluence in a cell culture well. While EVOM measurements are only qualitative, your throughput is much greater with an EVOM3. The EVOMs are portable and much more economical than an Ussing Chamber. Here Ben Dubansky, PhD explains the differences between EVOMs and Ussing chambers.
The EVOM is a special kind of voltmeter for measuring electrical properties across a layer of cells in culture or a biological membrane. We are measuring TEER (TER) - Transepithelial Electrical Resistance. The EVOM3...more
-
April 19, 2021
by Benjamin Dubansky, PhD, Animal Physiologist/Researcher
The EVOM is a special kind of voltmeter for measuring electrical properties across a layer of cells in culture or a biological membrane. It is the most commonly used commercial system for measuring across a layer of cultured cells. We are measuring TEER (TER) - Transepithelial Electrical Resistance. The EVOM3 allows us to zoom in and measure either resistance or voltage across these membranes or cells in culture.
Why was it invented?
The EVOM (Epithelial Volt Ohm Meter) was designed in the 80’s. It was invented back when multiwell culture plates were first introduced...more
-
April 19, 2021
The Peri-Star Pro is a popular peristaltic pump. Here we will show you how to install the tubing in the pump head so that you can use the pump.
-
First, remove the tubing fixture by pressing the Locking Tab on the left side of the fixture and pulling the fixture open.
-
Then pull the tubing through the fixture. Make sure the tubing is straight inside the fixture with no kinks.
-
Remount the fixture on the pump head. The rounded notch is on the right side of the fixture, and it fits against a steel rod on the Pump Head. When the other end of the fixture is pushed into place, the...more
-
-
April 19, 2021
The Peri-Star Pro is a popular peristaltic pump. Here we will show how to set the system parameters for your application.
Using the Control Knob to Navigate the Menu
Press the Control Knob to enter the setup mode in the main menu, then rotate the Control Knob to toggle between the four functions. Press the Control Knob again when you get to System Setting. Turning the Control Knob toggles between the submenu items.
Define System Parameters
- Tubing ID is the first submenu. To change tubing inside diameter, click the Control Knob. After clicking, a list of tubing IDs appears. Turn to the desired tubing ID and click the Control Knob to select it.
- Test Time sets the flow time when performing a calibration. To change the time...more

Recent Posts